How to Patch an Air Mattress?
by | Last Updated
Airbeds are great.
They don’t take much space, they’re easy to assemble, and they can save your sleep in certain conditions.
However, even a high-end air mattress isn’t immune to accidental punctures.
The good thing is, you can repair it yourself without sacrificing money to buy a new one!
I will show you three possible ways on how to patch an air mattress so you can choose the one that suits you best.
First, How Do You Know If Your Airbed Needs to Be Patched?
People sometimes confuse an actual puncture with a volume change that happens with an airbed during the night. Even luxurious beds tend to lose some air due to the difference between the day and night temperature.
So, how do you know it’s time to patch an airbed?
It’s easy:
- a punctured mattress will no longer maintain its shape;
- it will sag and wrinkle around you because it can not withstand your weight;
- you may find yourself tossing and turning throughout the night or may even begin to experience insomnia episodes.
All these signs might tell you that your airbed needs a fix. So, let’s move to how you do this!
Conventional Method: Using the Mattress Patch Kit (Or Items That Resemble It)
Almost all air mattresses available on the market today come with a repair kit in the case of accidental leakage.
So, to fix your air mattress, you’ll need the following:
- a lint-free towel;
- a solution to degrease the surface (nail polish remover is fine);
- a marker;
- a pulverizer with diluted liquid soap or dishwashing emulsion;
- 10-12 pounds of weight (for example, a stack of books or a large water bottle).
If you don’t have an air mattress repair kit, you can resemble it with the following items:
- rubber glue or epoxy;
- sandpaper;
- a patch of soft and flexible plastic material (I found out that the inner part of a used bicycle tire or a shower curtain will do perfectly).
Now you’re ready to perform the healing procedures.
Step 1: Find the Leak
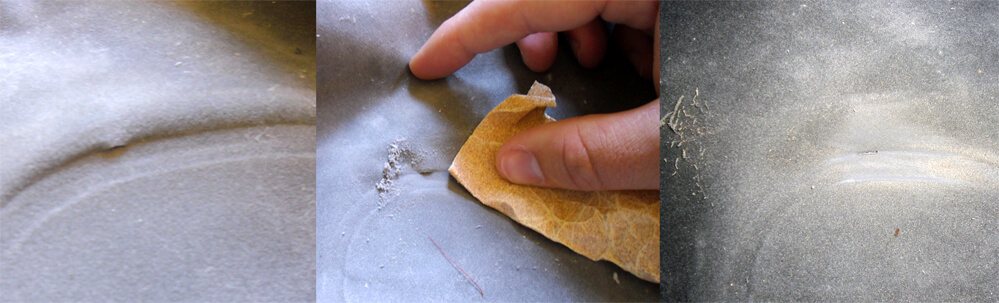
Before fixing the leak, you have to find where it’s located, right?
Here’s what you need to do:
- Inflate the mattress fully. Inspect how quickly it will lose the air to predict the leakage size and how much patching material you will need.
- Check the valve and the seams. These are the most vulnerable places of an airbed, so that’s where leaks typically appear. The thing is, if the valve is indeed broken, you probably won’t be capable of fixing it yourself. So, it’s a good time to contact the brand representatives and ask them about the warranty coverage.
- Flip the airbed and check the bottom. Another common place for leaks is the bottom. Especially if you’re often using your airbed for camping.
- Use your hands. Dampen your hands with water and slowly move them across the mattress. What you need to feel is the cold air stream coming from the hole in your airbed — this is the place where the hole is located.
- Try the dish soap method. Another way to find a puncture is to apply the water-diluted dish soap on a mattress surface. Air that comes from the hole will create the foam bubbles around it.
After finding the puncture, circle it with the marker so you won’t lose it while preparing your fixing kit.
You can rely on your hearing as well. Place a fully inflated mattress in a quiet room and slowly move your ear across the mattress surface. Note that if the puncture is too small, you won’t be able to hear the air leak.
Step 2: Prepare the Surface
After having found the leak, you need to make sure that the patch will adhere to the airbed surface properly.
To achieve this, go through the steps below:
- Scrub the surface with sandpaper. If a leak appears on the area with no flocking material, just rub it a bit and proceed to the next step. If the puncture is somewhere in the top area, you need to scrub out the flocking thoroughly until the rubber lower layer shows up. It’s essential to do in order to ensure that your patch will create a proper seal.
- Remove the grease. Now, you need to wash the puncture area with some solution to remove excess fat and particles that remained after sanding.
- Rub it dry. After that, take your lint-free towel and rub the area around the puncture. Make sure there’s no residue fiber or debris left.
You will also have to deflate your air mattress completely. Thus, the leaking air won’t prevent the patch from sticking so that the patch will seal the puncture properly.
Paper towels can leave fibers and dust, so use microfiber or cleaning fabric napkins instead.
Step 3: Apply Your Patch
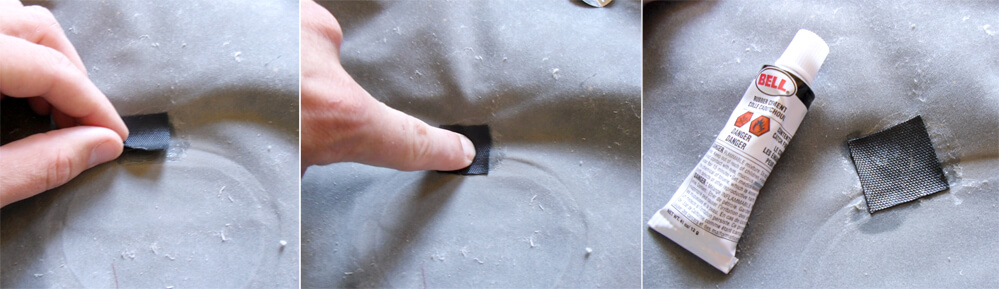
Now you finally can begin to patch a hole in an air mattress. The process itself is straightforward and requires you to follow these steps:
- Cut the proper amount of the patching material. The patch must cover at least an inch around the puncture. Remember: it’s always better to cut a little bit more than you think is enough.
- Cover the leaky area with glue. Apply the good amount of adhesive around the puncture area. You need to ensure that it will create a good seal, so don’t skimp on it. After all, you can always wipe out the excess. If you’re using Gorilla Glue, be sure to apply it to the patch as well.
- Apply the pressure. Now, stick the patch to your mattress and flatten it so that there would be no air bubbles between the layers. Apply some hand pressure to it for 30-60 seconds and then put at least 10 pounds of weight above it. Leave the patch at least for 6 hours to let the glue dry completely.
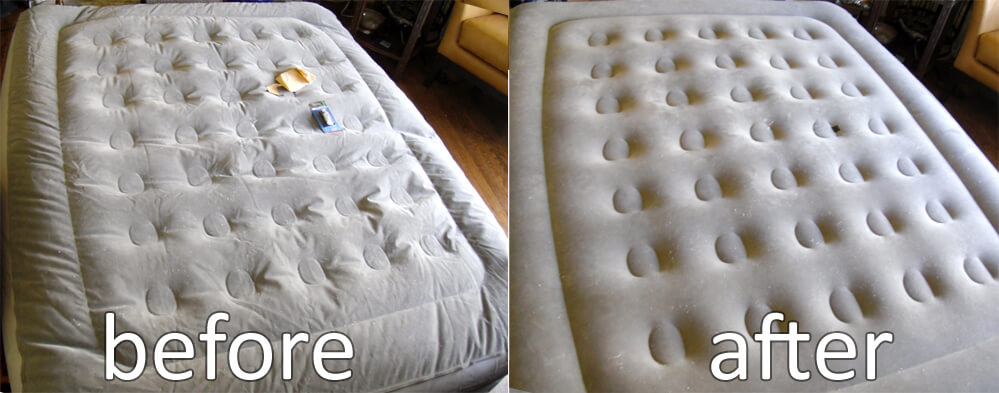
When that time has passed, inflate the mattress and check if there’s any leak by using the same damp hands’ method. If you don’t feel any air streams coming from under the patch, congratulations!
You’ve just repaired your mattress!
While working with the glue, take care of your safety. Use the gloves and the breathing mask. It’s highly recommended because all adhesives contain VOCs, such as formaldehyde, that might be harmful to your health.
Now, if you need some visual representation of what I’m talking about, you can check this video guide:
How to Fix a Hole in an Air Mattress Without a Patch Kit?
Okay, sometimes a puncture happens when you do not have a mattress repair kit by your side.
Don’t worry!
I have 3 alternative methods on how to fix a hole in an air bed and bring it back to life.
- Use a bike tire repair kit. These kits also contain sandpaper, glue, and patch (or the patch itself might be self-adhesive). Just follow the instruction provided with the kit, and you’ll be happy.
- Use a hot glue gun. This is quite a controversial method. Many guides will tell you to apply the hot glue using the low-temperature settings and thus create a cork for your leak. However, the glue used for the gun isn’t as sticky, so it might lose its adhesion and cause the leakage to reappear. Not to mention that the hot tip of the glue gun can cause additional damage to the outer layer of your mattress. But you can still try.
- Try the duct tape. Yes, you can patch an air mattress with duct tape. Just remember that the glue used there is not designed to bind up with plastic or rubber. Thus, you might consider it just a short-term solution, for example, for camping conditions. But after returning home, be sure to give your airbed a proper fix.
Remember, most airbed brands are strongly against the DIY methods of repairing the punctures and typically require using the kit that came with the mattress. Using the techniques above, you will void your warranty coverage, so you’re doing this at your own risk.
Have you experienced any accidents with your air mattress? How did you fix the leaks? Feel free to share your tips in the comments below!


No Comments